Quick start for laser operation
This is the manual for quick operation for the Toptica CTL laser diode in LAB 345 allowing
910-980 nm tunability.
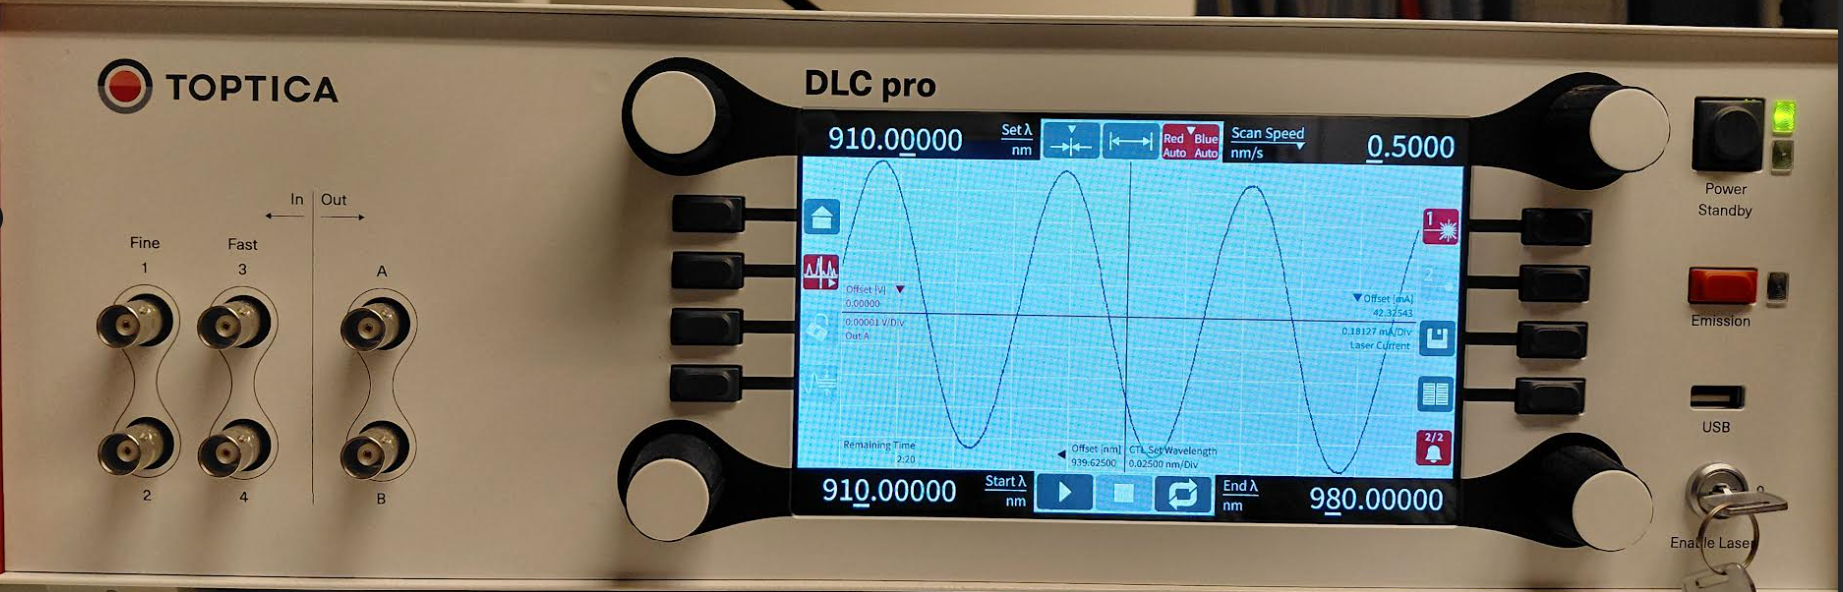
The laser is operated with the DLC pro controller located above the optical table with the laser. Full controller manual is also available in this folder.
There are a few modes of operation that we normally use:
Stable operation at a selected wavelength
Long-range Wavelength scan for performing maps
Short-range wavelength scan for performing HOM setup optimization
At any given time the laser head may also be put in "Stabilization mode" to stabilize the output power based on internal measurement diode
IMPORTANT: The wavelength of the laser is based on the internal calibration and may vary slightly with the actual wavelength
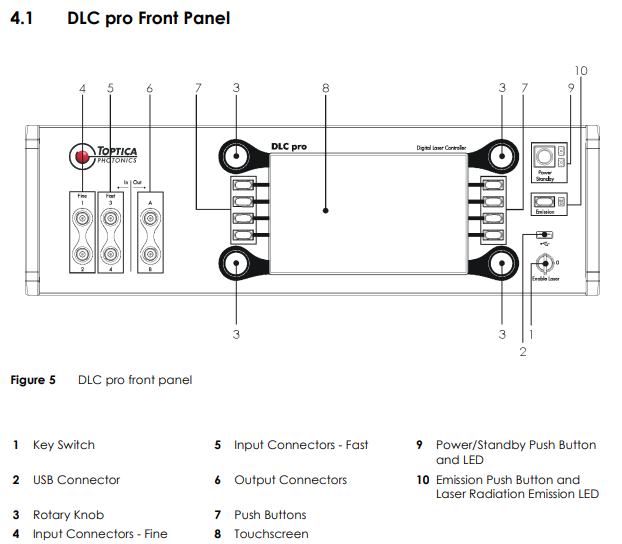

To start the laser:
- Turn on the DLC Pro controller (button 9)
- Select mode of operation (one of the buttons on the left)
- Turn on the emission of the laser by turning the key clockwise and click the "Emission" button
- Pull up the red manual shutter on the laser head
Switching between menus and modes of operation is based on the left side buttons, here there are four options:
- Home panel (top left)
- Short/Long-range wavelength scans (second to top)
- Stabilization mode (bottom left)
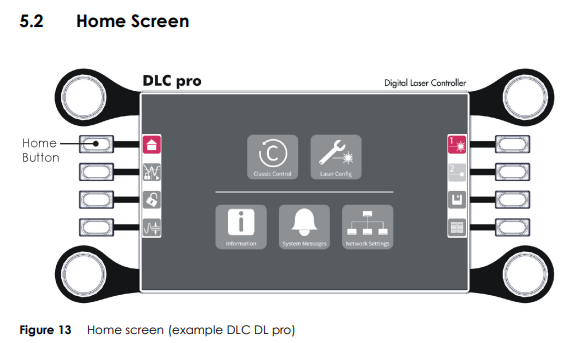
Home panel (top left button): Access to network settings (MAC, IP adresses etc.)
This menu looks a bit different for CTL laser, no classic control available for example
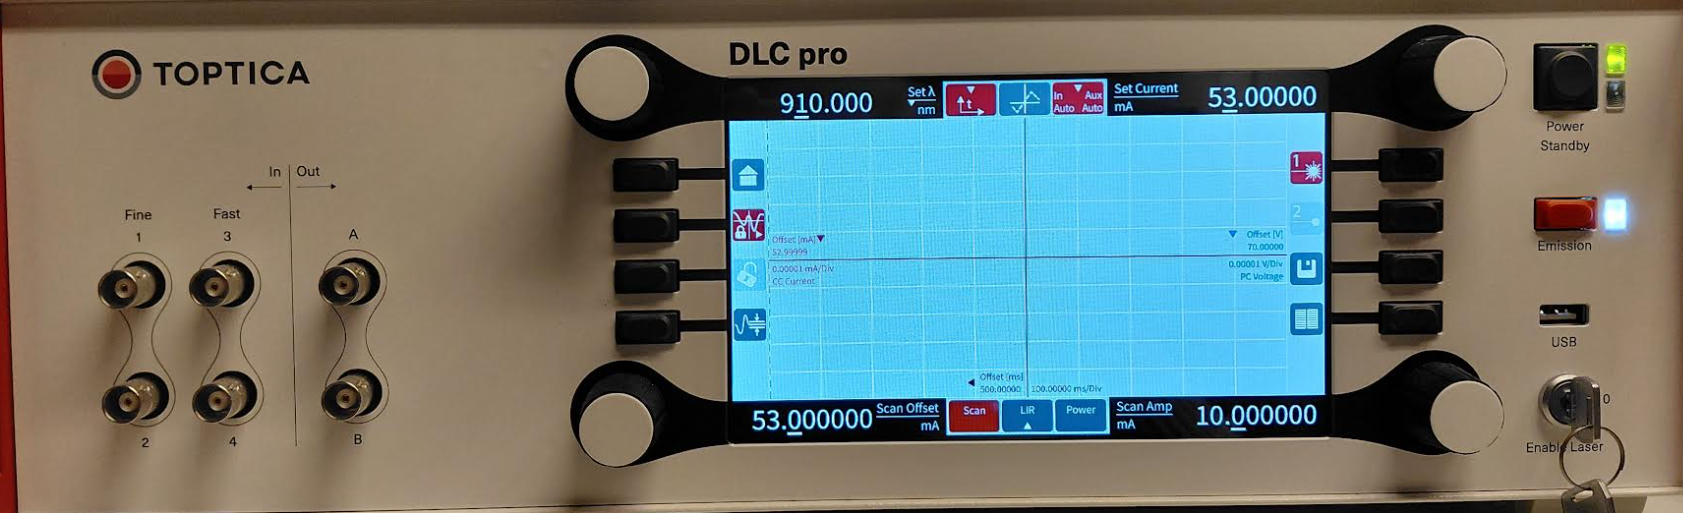
Stable operation and short-range wavelength scan panel (select with second to top left-side button)
For quick operation at a given wavelength:
- Select wavelength with top left rotary knob. With black background rotating the knob changes the selected decimal number. If you click the background changes to white and you can select the decimal number then click again to go back to black background.
- Click on the "Power" panel at the bottom in the middle of the screen and select the operating power.
For small wavelength changes for HOM calibration, click on the middle top panel to begin scanning,
To stabilize the power during the scan (recommended), click the bottom left button so that it is red and not greyed out
To change scan parameters (amplitude, offset, modulation function shape and frequency) click the bottom button on the right
For long-range wavelength scan:
- Click again the second to top button on the right to enter the wavelength scanning mode.
- Select the scanning speed (top right knob) and the start/end wavelength (bottom knobs)
- Click the arrow panel in the middle bottom of the screen
Long-range wavelength scan panel (click again second to top left-side button)
Operation with the TOPAS Software:
To control the laser with the TOPAS software first make sure it is connected to the PC, for that we use ethernet cable (the long white one) connected via USB dongle to the left PC
Program should automatically try to connect on its startup. If it cannot, try restarting PC/laser controller. If it doesn't you can try to connect the laser to the second PC. It also has the topas software.
to do : screens of the program menus and operation
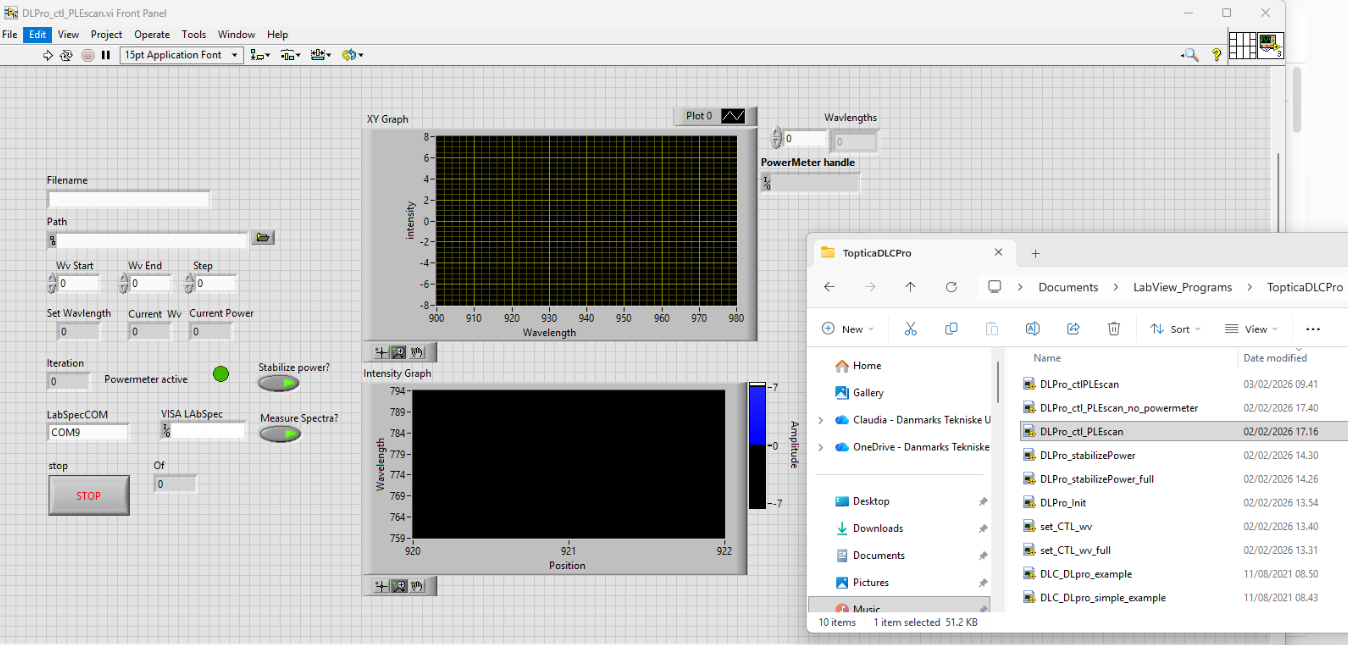
Operation with the LabView software:
Can be used for performing automatic PLE maps as it enables connection to the LabSpec software.
- Open the LabView program->Documents/LabView_Programs/TopticaDLCPro->DLPro_ctl_PLEscan (if you have thorlabs powermeter connected) or ->DLPro_ctl_PLEscan_no_powermeter if you dont
- Fill out the input boxes (Path -> folder to save the file, Filename / Wv start, End and step for wavelength scan setting)
- Click the stabilize power if you want power stabilization, it will keep it on the power level that is currently selected in the laser (to change open Power menu panel in the controller or in the TOPAS software)
- Click the Measure Spectra if you want to measure the spectra during the scan via LabSpec
- Start the software, more information about using LabView with LabSpec software available in other libraries